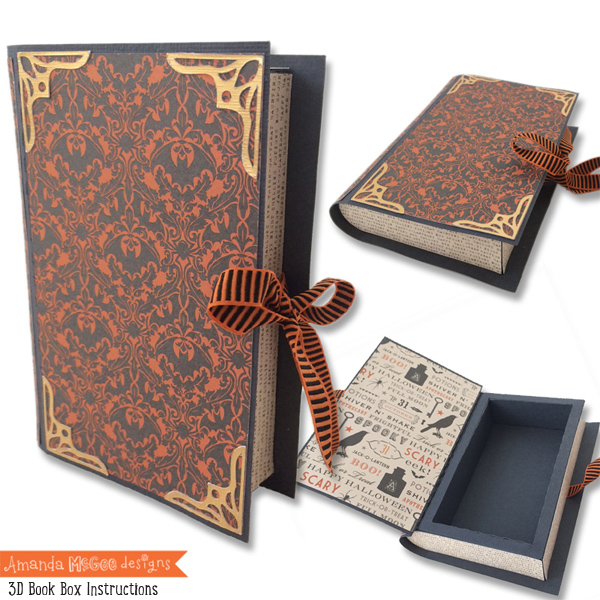
3d book box Instructions
Create your own 3D book box from paper cardstock, perfect for holding treats or a gift card, or embellish as a fun spell book for Halloween decor!
This digital die cut file is available for sale in the Silhouette America Online Store.
Supplies
This digital die cut template makes it easy to create your own cardstock 3D Book Box. You will need the following supplies to create this project:
Silhouette Cameo
Heavyweight cardstock paper (I’ve used American Craft’s Autumn, Neutrals, Foil and Haunted Hollow)
Glue (I’ve used Scotch Brand Quick Dry Adhesive)
Ribbon

Step 1
Begin by cutting template pieces from desired cardstock and paper.
STEP 2
Fold up side flaps and fold in side tabs.

STEP 3
Add glue to the side tabs.
STEP 4
Fold in and adhere side tabs to create the box.

STEP 5
Repeat for all four side tabs.
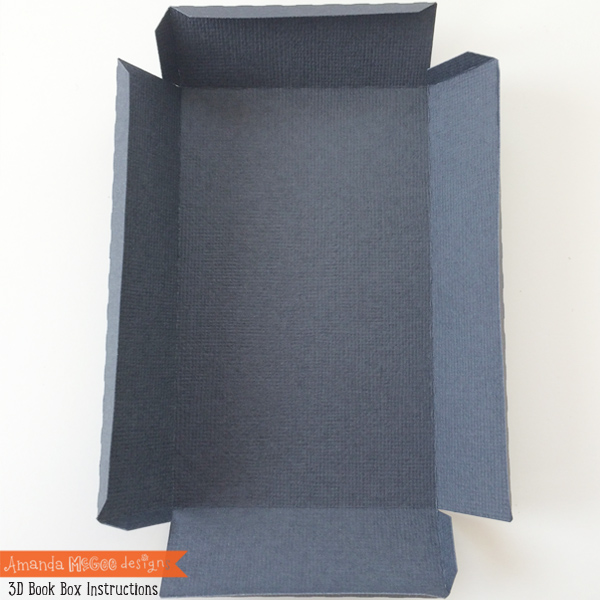
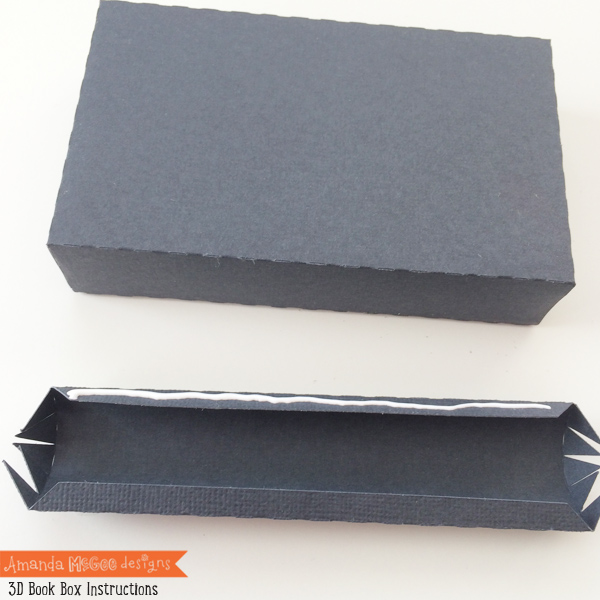
STEP 6
Fold tabs and flaps to create the inside of the box as shown.

STEP 7
Add glue to the side tabs of the inside of the box.

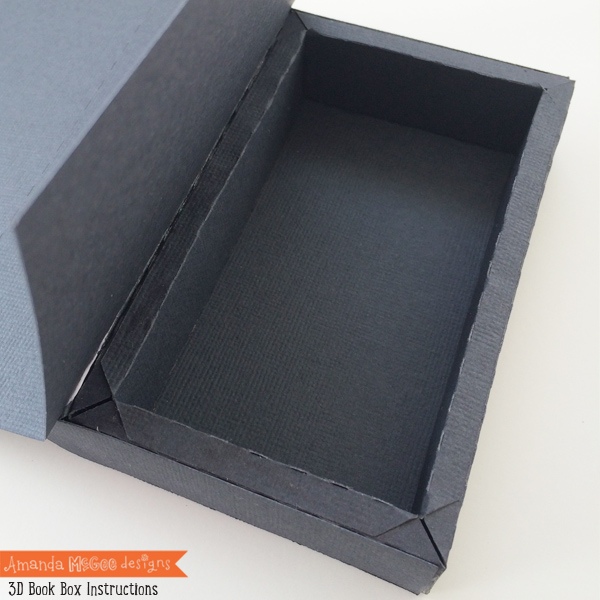
STEP 8
Adhere tabs to create the inside of the box as shown.

STEP 9
Add glue to one side of the flaps.

STEP 10
Place glued side flaps inside of box and press and adhere to inside of box. Press flaps down with a craft stick if needed.

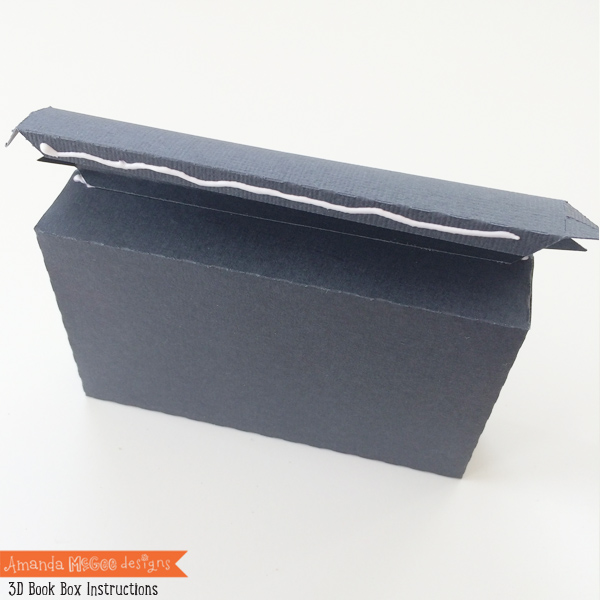
STEP 11
Add glue to the bottom side of the top flaps and press down to adhere.

STEP 12
Repeat for all four flaps to create the inside of the box. Allow glue to dry.

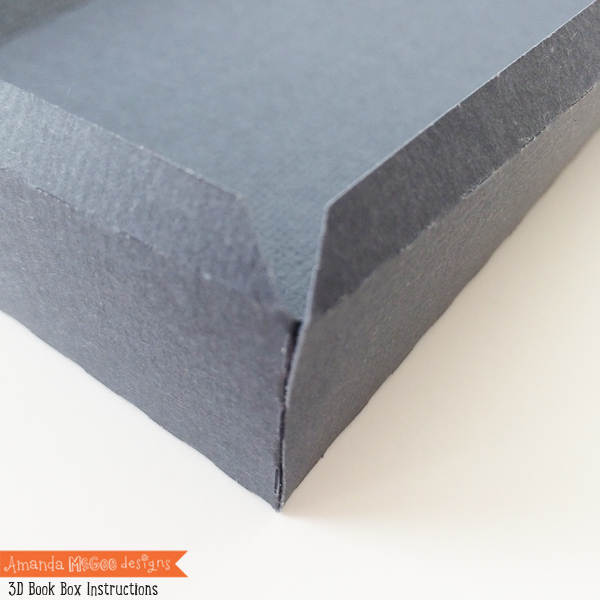
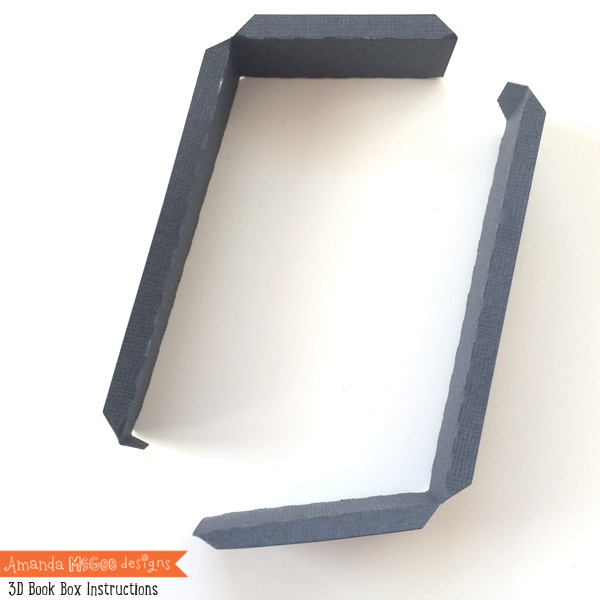
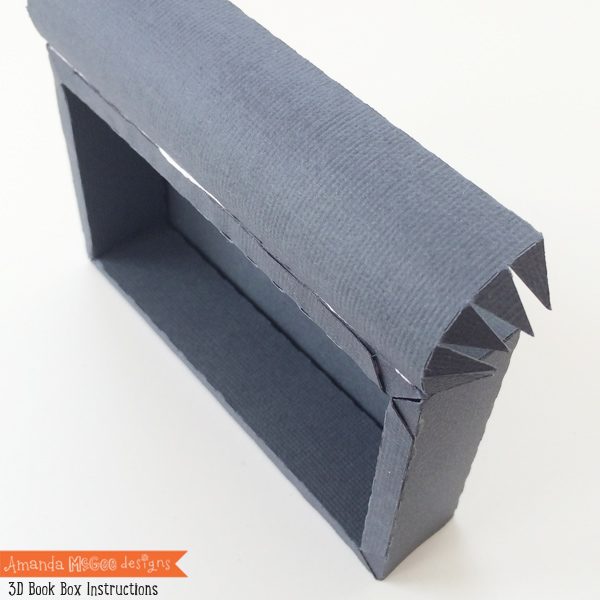
STEP 13
Fold side flaps and edge tabs and curve as shown.
STEP 14
Add glue to edge of side tab.
STEP 15
Carefully and patiently line up edge of the curved piece with the edge of the box. Press tabs to adhere and allow glue to dry.
STEP 16
Add glue to the other tab as shown.

STEP 16
Tuck the tab under and align with the edge of the bottom side of the box as shown. Again, patience and allow glue to dry. Sliding a craft stick inside (where the triangle tabs are) and pressing down on the glued tab will help adhere it.

STEP 17
Add glue to the side and the triangle tabs.

STEP 18
Adhere the side piece to the box.

STEP 19
Add glue along the edge of the curved piece close to the seam.
STEP 20
Carefully line up the cover section along the score lines and hold to adhere.

STEP 21
On the other side of the box, glue and attach the end of one ribbon piece. Add glue to the rest of the curved section.

STEP 22
Add glue to the back of the box as well. Wrap the cover around to the back to adhere and allow glue to dry.
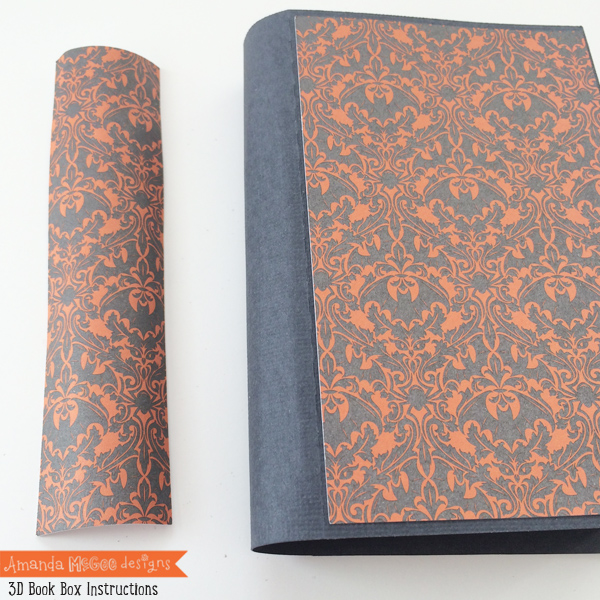
STEP 23
Glue decorative paper piece to the front and back of the cover. Slightly bend a curve in the binding piece before gluing to the outside of the book box.

STEP 24
Glue the other section of ribbon to the inside flap of the cover.

STEP 25
Glue and adhere the decorative section to the inside of the book box, on top of the glued ribbon piece.

STEP 26
Add glue to the box frame.
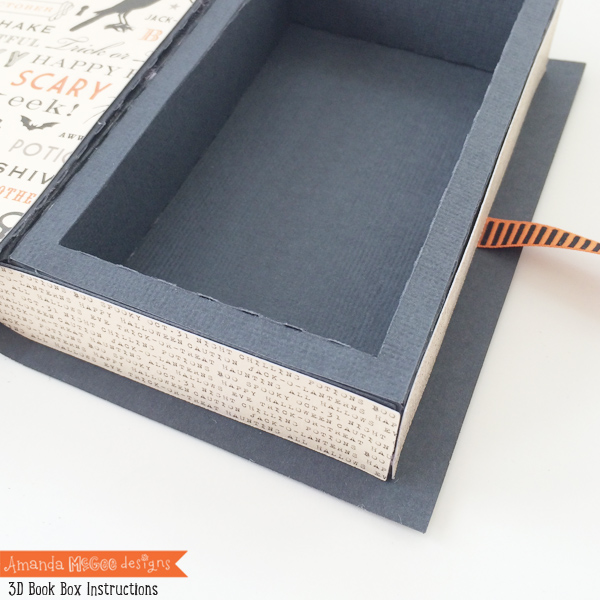
STEP 27
Attach to the edge of the box. Add the decorative edge pieces to the outside of the box.
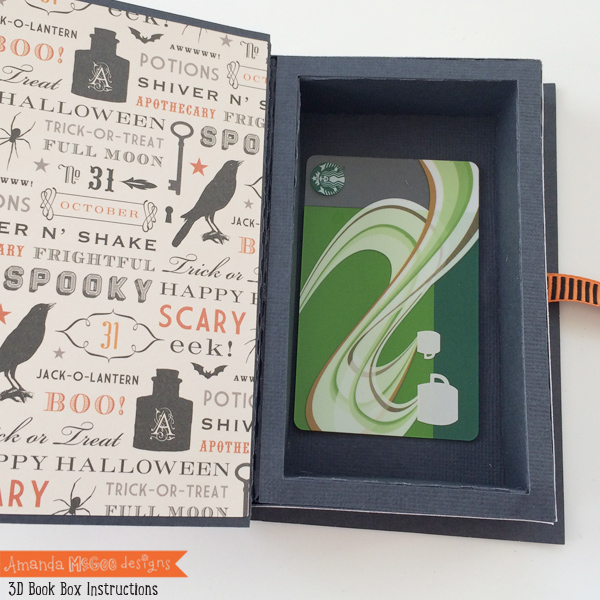
STEP 28
Fill the box with a gift card, or candy treats.

STEP 29
Add the decorative corner pieces if desired and tie ribbon to close the box.

STEP 30
You might also like to make a magic spells book for a fun Halloween decoration. Tip: Make sure to carefully curve each side piece before gluing to the edge of the book. Add white chalk ink for a fun accent.
You can find the magic spells book cover available for sale in the Silhouette America Online Store.

Project complete!
Makes for a cute Halloween for your favorite little witch!
Enjoy and happy creating!
:) Amanda