3D Easel Instructions
Create your own 3D paper easel, works great with the 3D 4×6 Frame.
You can find the 3D Easel digital die cut file for sale in the Silhouette Design Store online.

Step 1
This digital die cut template makes it easy to create your own cardstock 3D Easel, just the perfect size for holding the paper cut 3D 4×6 Frame or for holding scrapbook pages or other lightweight paper art. You will need the following supplies to create this project:
Silhouette Cameo
Heavyweight cardstock paper (I’ve used American Craft’s Autumn)
Glue (I’ve used Scotch Brand Quick Dry Adhesive)
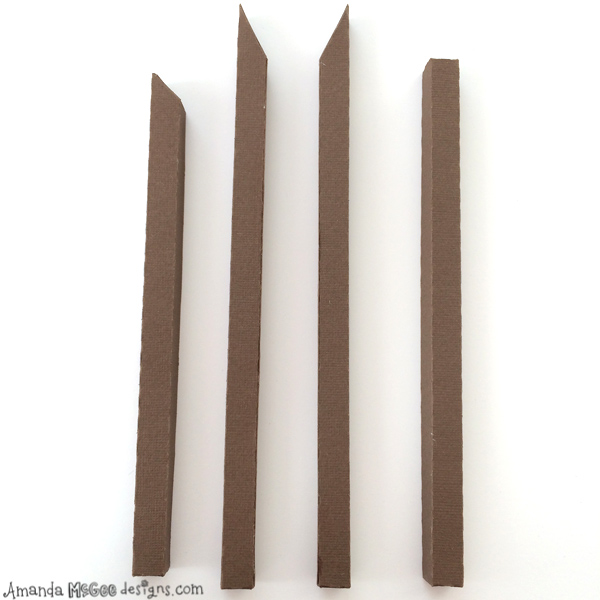
Begin by cutting template pieces from desired cardstock. Fold along all score lines.

STEP 2
Add glue along the long side tab. Fold inside to adhere to create the post.

STEP 3
Add glue to the angled tabs. Fold top flap to adhere.

STEP 4
Add glue to the bottom tabs and fold flap to adhere.
STEP 5
Repeat for all four posts.

STEP 6
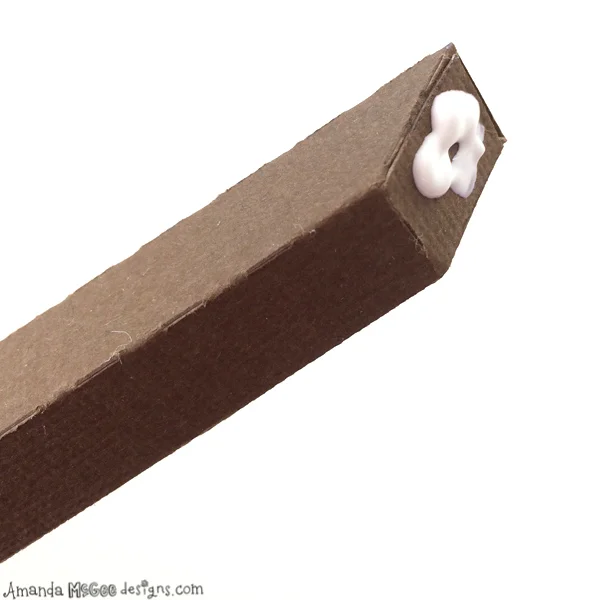
Add glue to the top of one of the taller angled pieces.

STEP 7
Press both angles together to adhere. Allow glue to dry. Add glue on each side along bottom edge, about one inch up or wherever you desire to place the cross piece. Place on top of the glue and allow to dry.
STEP 8
Add glue to the top of the shorter angled piece.

STEP 9
Flip the A frame over. Place glued post piece to the top of the A frame. Support this piece while the glue dries. (I’ve used my glue bottle to hold the post.)

STEP 10
Once the glue has dried the 3D Easel is complete and ready to use!