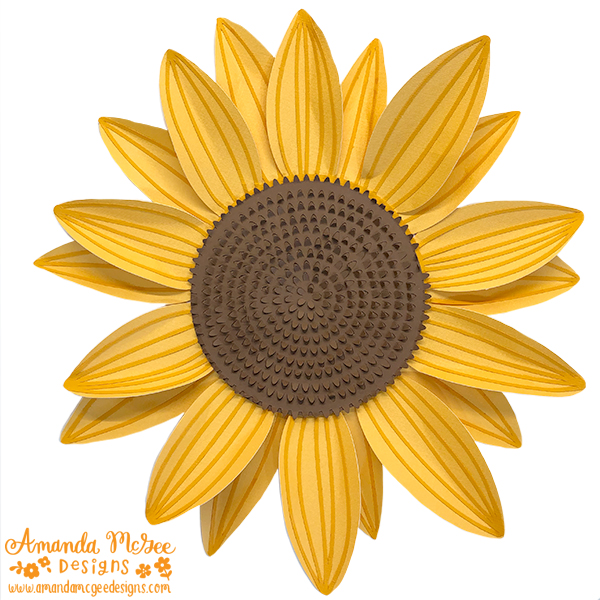
3D Lined Sunflower Instructions
The cut file is available for sale in the Silhouette Online Design Store HERE.

Step 1
Cut all pieces from desired cardstock.
STEP 2
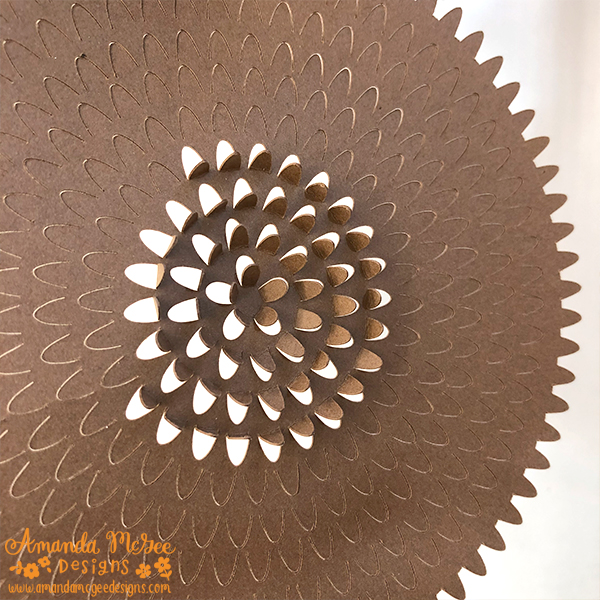
Fold up “seed” tabs in the flower center.

STEP 3
Glue seed layer on the reverse side as shown.

STEP 4
Adhere to the flower center circle. Before the glue dries, be sure to fold up any seed tabs that might have been folded down. Set aside and allow the glue to dry.

STEP 5
Glue the center of one of the lined petal layers. Adhere to the solid petal layer. Before the glue dries, adjust the fit to make sure the lines match up with the petal layer below. Repeat for second petal layers. Allow glue to dry.

STEP 6
Add glue to the back side of the lined layer. Adhere the lined layer to the petal layer.

STEP 7
Repeat for all petals. Repeat this process for the other petal and lined layers. Allow the glue to dry.

STEP 8
Glue the center of one lined petal layer.

STEP 9
Place the other petal layer on top and adjust to fit so the petals overlap each other. Bend and curl the petals as desired. Add glue to the center of the flower.

STEP 10
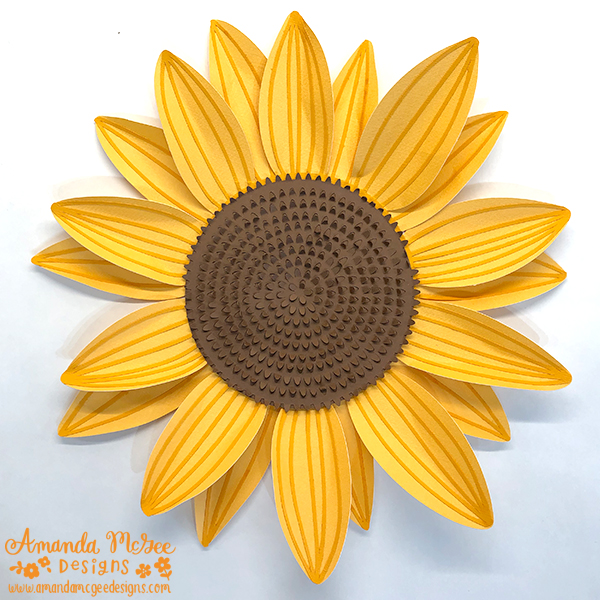
Place the seed center layer on top as shown. Adjust the seed tabs and curl the petals for added dimension.
STEP 11
You could glue or place this happy sunflower on a wreath, add a ribbon to the back and hang from a door, or attach to a gift bag for a cheerful embellishment.
Enjoy and happy crafting!
:) Amanda