3D Tiny Barn Snowglobe Instructions

Coming soon to the Silhouette Design Store online.
This tiny barn is really tiny! It will fit inside a plastic ornament and you can fit it on top of a battery operated tea light to created a cozy glow coming through the windows and doors. It makes for a really fun farmhouse Christmas decoration.
FYI: To create the snowglobe effect, you will need fake snow and one half of a plastic Christmas tree ornament sized 80 mm. This is also designed to fit on top of a WIDE mouth jar.

Add glue to the inside of the ring of the wide mouth jar lid and lace the round piece inside the lid.

Glue the top of the lid and place the scalloped edge piece on top. If you don’t want the metal edge showing on the sides, you might want to add the border piece before gluing on the top. That piece has the zig zag edge, those tabs can be glued and folded onto the top of the metal rim. This step is shown later, but would be much easier if added at this point in the process.

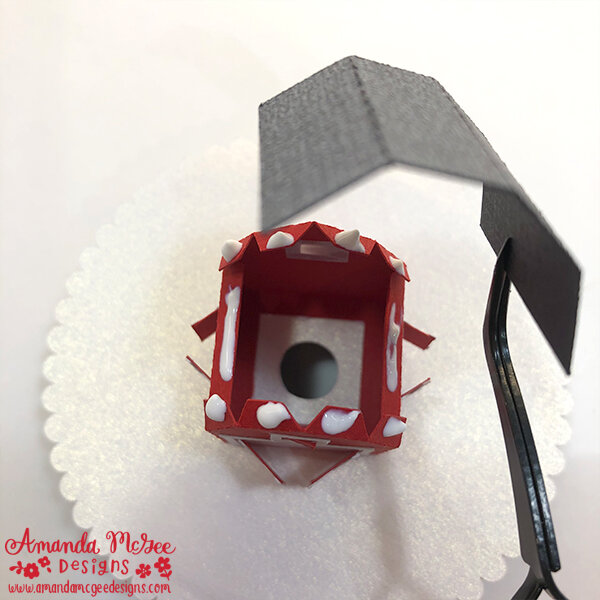
Fold all the perforated edges and tabs as shown.

From the inside of the barn, glue around the door and window openings as shown. Place the vellum over the window openings, being careful not to glue them shut. Flip over to make sure the windows/doors still open. Allow glue to dry.

Carefully add glue to the reverse side of the trim pieces and place around the windows and doors as shown. Glue and add the cross pieces to the doors as well.
I find using a fine tip glue pen works the best when gluing tiny pieces! A tweezers works really well for placing those tiny items as well.

Fold the barn in half and glue the side tab and adhere to the other side of the barn as shown.

Unfold the barn and add glue to the bottom tabs. Adhere to the scalloped edge base centering over the hole.
Fold along the perforated lines of the barn roof piece. Glue the top tabs on the barn.

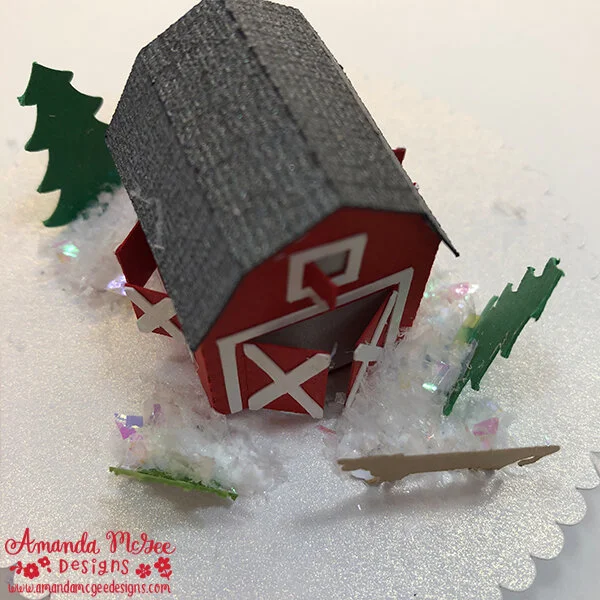
Place the roof on top. Gently press down and hold to adhere.

Fold the tabs on the bottom of the trees and add glue. Place wherever desired around the barn, keeping in mind to not go too close to the edge where the plastic dome will be placed. Fold the tab on the bottom edge of the cow and place where desired.

Cover up the tabs with glue as shown.
Sprinkle fake snow on top of the glue.

Fold the bottom tabs on the fence pieces and place them around the barn where desired. Be mindful of not going too close to the edge where the dome will be placed.

Add glue on top of the fence tabs as shown.

Cover the glued tabs with fake snow. Carefully add more snow loosely to the ground.

Add glitter glue generously around the edge of the plastic ornament. Be careful not to smear or drip too far inside of the dome as that will obscure the view of the barn scene inside. Just keep the glitter glue to the edges. If you do get some on the inside, wipe away with a damp cloth before it dries.

Place the plastic ornament dome on top of the scalloped edge piece. Add more glitter glue all the way around the edge of the dome to seal it shut.

If you’re not a fan of the metal ring showing, you can add the border by folding the zig zag tabs and gluing to the underneath side of the scalloped edge. As stated in the previous steps, you might want to do this step earlier in the process.

Add sticky glue dots or double stick tape to the top of the battery operated tea light.
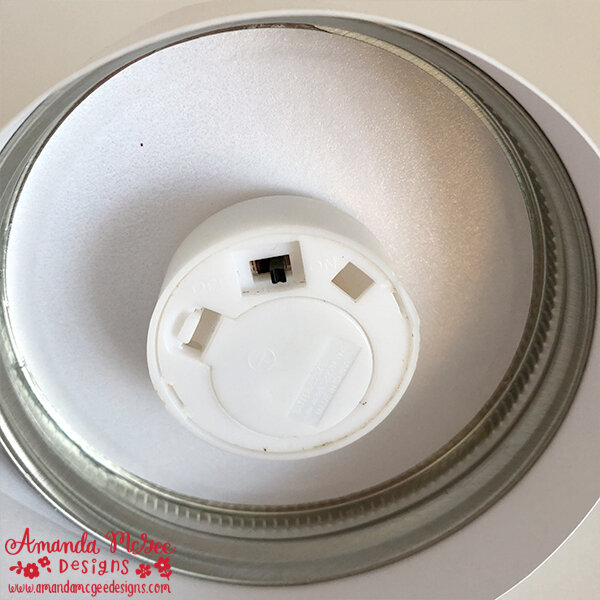
Place the battery operated flame into the hole and carefully press to adhere the glue dots to the underside of the base to adhere.

Place the snowglobe on top of the jar! Make sure you fill with some goodies before giving it as a gift! If you’re using food you should use wrapped items since the food might come in contact with that battery operated light. Please ignore my gingerbread cookie suggestion, it’s just for an example!
Enjoy and happy crafting!