3D Tiny Gingerbread house Instructions
This digital die cut template is available for sale online in the Silhouette Design Store HERE.

Step 1
Gather all the required elements: cardstock, glue, foam squares, a plastic ornament if desired (found at Michael’s,) fake snow and glitter glue, and a battery-operated tealight. Begin by cutting the gingerbread house template pieces from cardstock. Cut the window pieces from vellum. Cut the icing accent pieces from shimmery paper for added glimmer effects. Cut the candy pieces from red and glittery green paper.
Pre-fold the perforated edges of the gingerbread house. Glue vellum window pieces to the inside of the house. Be sure that the door sections are not glued! Allow glue to dry before moving on to the next step.
STEP 2
Add glue to the reverse side of the icing accent pieces with a fine tip glue pen. Place icing pieces as shown on the front of the gingerbread house.

STEP 3
Add glue to the reverse side of the candy centers and the gumdrop pieces with a fine tip glue pen. Place candy pieces as shown on the front of the gingerbread house. Add detail layer to candy canes as shown.

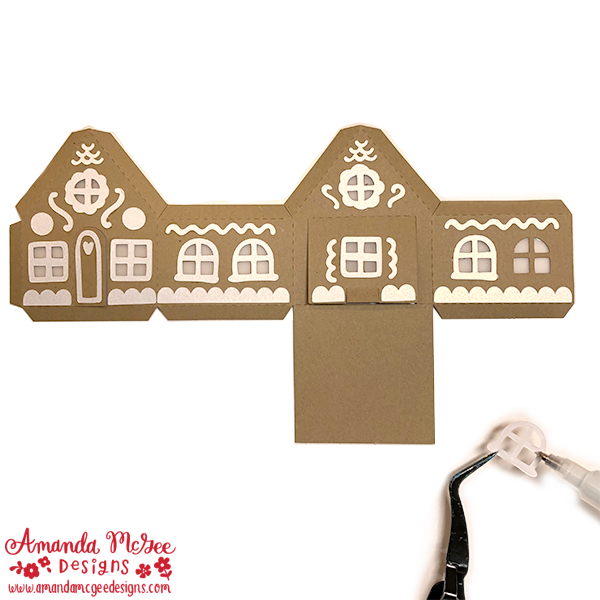
STEP 4
Add glue to the side tab and adhere to the inside of the other edge to form the gingerbread house shape as shown.

STEP 5
Glue tabs, fold up the bottom flap and adhere to create the bottom base of the gingerbread house.

STEP 6
Glue icing accents to the roof of the gingerbread house. Fold roof in center to create peak. Allow glue to dry before moving on to the next step.

STEP 7
Glue and adhere the gingerbread house on top of the scallop edge base as shown.

STEP 8
Glue tabs (as shown) and adhere to one side of the roof. Repeat for the other side of the roof. To adhere, you might have to press the tabs from the inside of the house (reaching in with a craft stick through the back flap.)

STEP 9
Lift the flap on the back door and slide the battery operated tealight inside. It will be a tight fit! (If you find that the battery operated tealight that you have doesn’t fit, try to find a smaller one, or cut off the little feet on the bottom.) Close the flap. Bend the little tab up on the back flap to make it easier to open again to turn off the battery operated light.

STEP 10
Add the candy canes and gingerbread people where desired! In this example, the gingerbread people were glued together and then glued to the door. The tab of the candy cane was placed underneath the house before the glue was dried. Be sure to cut the solid layer in white and layer the decorative layer on top as shown. Add glitter glue where desired for extra shimmer.
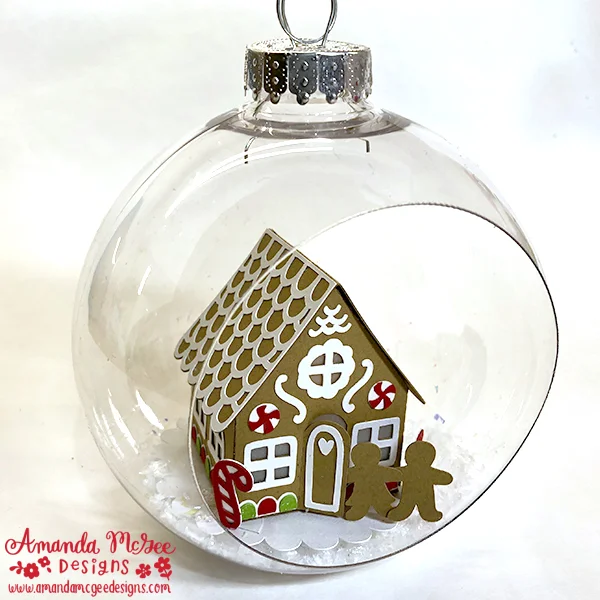
STEP 11
The gingerbread house will fit inside an open-front type plastic Christmas ornament. (Found at Michael’s.)
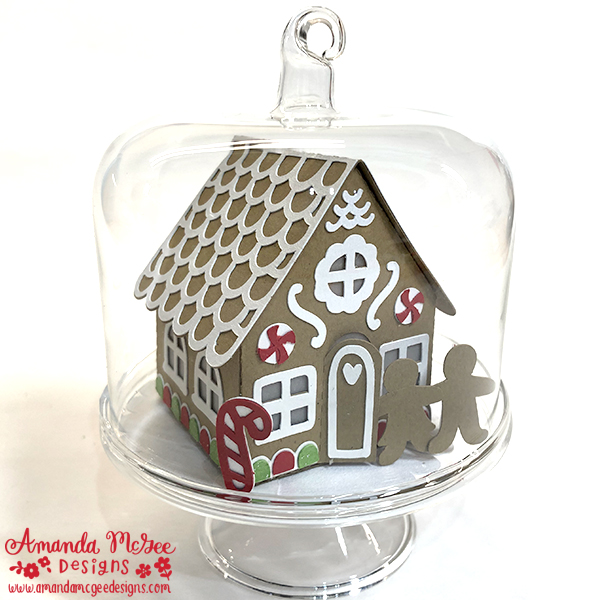
STEP 12
The gingerbread house will fit inside a miniature glass cake plate and dome. So cute!! (Found at Joann. I have also found them at Michael’s.)
Enjoy your holiday crafting!
Amanda