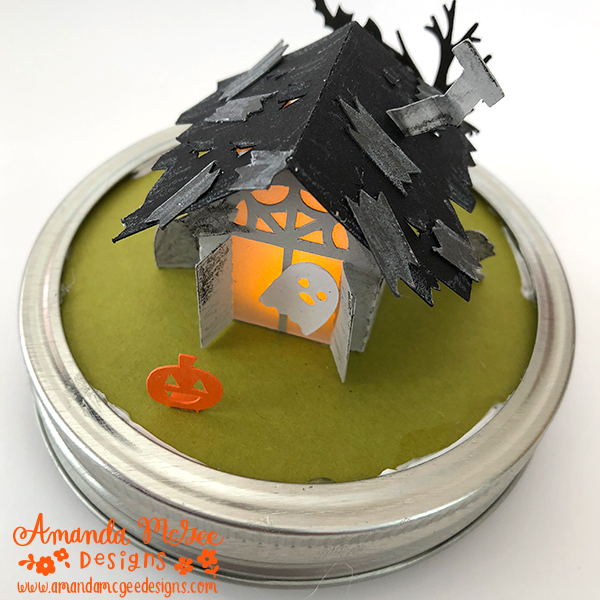
3D Tiny Haunted House
Create this tiny haunted house that is designed to fit on top of a wide mouth mason jar and can be covered with half of a plastic hanging ornament. It can also sit on top of a cardstock or chipboard base and be illuminated by a battery operated tealight.
Available for sale in the Silhouette Design Store.

Step 1
Begin by cutting the house template pieces from cardstock, as well as the base piece from chipboard for added stability, and the window pieces from vellum. Two layers of chipboard glued together will also add stability to the top section. Glue cardstock paper on top of the base (shown here in green) and allow the glued layers to dry.

STEP 2
Pre-fold the perforated edges of the house. Glue vellum window pieces to the inside of the house. Be sure that the door sections are not glued! Allow glue to dry before moving on.

STEP 3
Form the house shape by gluing side tab.

STEP 4
Add distressed texture with crayon to the house and board accent pieces. Adhere the board pieces and the ghost to the house where desired.

STEP 5
Glue house to the base.

STEP 6
Distress roof boards and chimney with crayon. Add boards to roof where desired. Insert chimney into slot on roof. Lift and bend cuts on roof. Fold roof in center to create peak.

STEP 7
Glue top tabs on house and attach the roof. Fold bottom tabs on tree, tombstones and jack-o-lantern. Glue tab and attach to base where desired. Attach bat to tree. Make sure to leave space around the edge of the base to add the overlapping trim.
STEP 8
Attach the base to the inside of the lid of the mason jar. Allow glue to dry. Hot glue a battery operated tea light underneath the house on the inside of the base and lid. The bulb of the light fits inside the hole on the base.

STEP 9
Wrap the black zig zag edge border around the base. Glue and allow to dry. Attach the orange lettered border on top of the black layer around the base. Attach the zig zag circle on top of the mason jar lid. Before glue dries, move on to the next step.

STEP 10
Fold bottom tabs of fence pieces and attach underneath the zig zag trim as shown. Allow glue to dry. (Add distressing texture with crayon beforehand if desired.)

STEP 11
Glue tag layers together. Wrap around the jar and tie with baker’s twine. Glue half of a plastic ornament on top if desired. Add glitter or confetti before putting on the dome if desired. Screw on the jar lid onto the jar after the glue has dried.

STEP 12
This makes for a fun Halloween decoration or for gifting treats!
Happy crafting and boo to you!
:) Amanda