3D Tiny House Instructions
This digital die cut template makes it easy to create your own paper cardstock 3D Tiny House, just the perfect size for a battery operated LED tea light.
Make several and create your own Christmas or winter village. You will need the following supplies to create this project:
Silhouette Cameo
Heavyweight cardstock paper (I’ve used Michael’s Brand Recollections Special and American Craft’s Foil)
Vellum
Glue (I’ve used Scotch Brand Quick Dry Adhesive)
Battery Operated Tea Light
Begin by cutting template pieces from desired cardstock and window shapes from vellum.
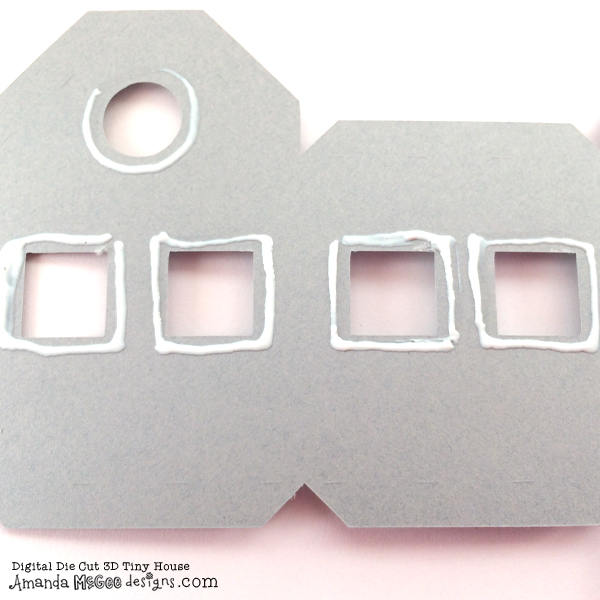
Step 1
Add glue around the inside of the window openings.

STEP 2
Place vellum windows over the openings.

STEP 3
Glue vellum inside the door (as described above for the windows) and add glue to the remainder of that half of the inside of the door.

STEP 4
Fold door in half and allow glue to dry.

STEP 5
Add glue to the side tab on the door.

STEP 6
Adhere the glued tab to the inside of the house in the door opening.

STEP 7
Add glue to the back side of the window and door trim pieces.

STEP 8
Place trim pieces over the windows.

STEP 9
Place the remaining window trim and trim around the door opening. Allow the glue to dry.

STEP 10
Fold in all the tabs and corners.

STEP 11
Add glue to the side tab.
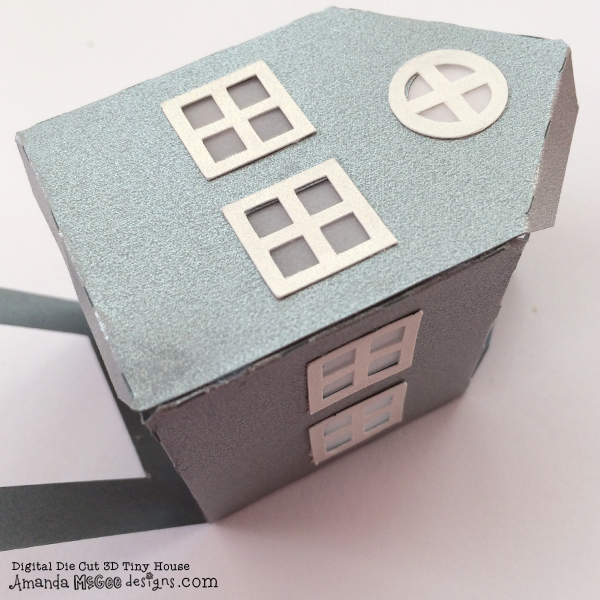
STEP 12
Adhere tab to the inside of the house.

STEP 13
Add glue to the bottom tabs and adhere to the base flap.

STEP 14
Insert a battery operated tea light into the house. DO NOT USE A REAL CANDLE OR OPEN FLAME!

STEP 15
The opening on the bottom will allow room to utilize the off/on switch. Alternatively, the bottom flap could remain unglued and the opening could be omitted.
STEP 16
To create the shingles on the roof, be sure to arrange the scalloped edge strips so they alternate sides where the half scallops end and begin. This will create the staggered appearance.

STEP 17
Add glue along the bottom edge of one side of the roof.

STEP 18
Place one strip along the glued edge, allowing scallops to overhang.

STEP 19
Add glue along the top edge of the scallop strip.

STEP 20
Place the next scallop strip onto the glue.

STEP 21
Repeat the process to adhere the remaining scallop strips.

STEP 22
Repeat the process of adding scallop strips to the other side of the roof.

STEP 23
Add glue to the top tabs. Make sure the tabs are not folded in too far, they need to be able to stick to the roof.

STEP 24
Place roof on top of the glued tabs.
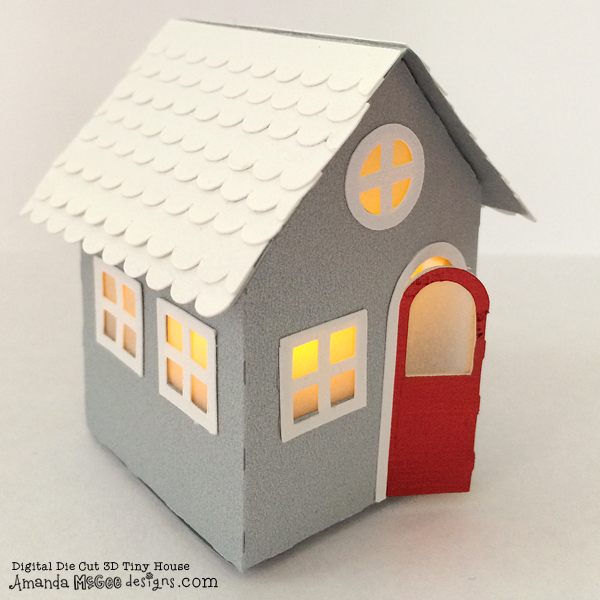
STEP 25
Pull the door slightly open if so desired. The 3D Tiny House is now complete! Make several and create your own Christmas village, or try making one from pastel colored papers for a sweet cottage for spring decorating.
Enjoy and Happy Creating!
:) Amanda