Dollhouse Coloring Book Instructions
Print and cut files are available for sale in the Silhouette Online Design Store HERE!
Instructions are in progress… please check back soon.
To create this Dollhouse Coloring Book, you will first need to assemble the 3D Paper Dollhouse Book. The coloring pages were designed to fit on each page of the 3D Paper Dollhouse book, but they can also be printed and assembled without the dollhouse template. In the Silhouette software, each print and cut page can be ungrouped and separated to be easily printed and cut on letter size paper. Here is how you can do that!
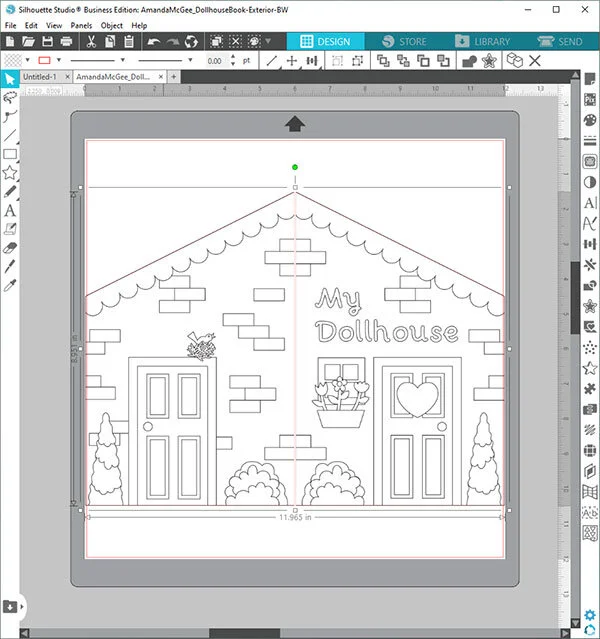
To print and cut the coloring pages from Silhouette Studio, you will want to open the file for the outside cover.

To set up the coloring page to print on letter size paper, go to page setup and select Letter from the Media Size. Then select “on” for the registration marks. Use the default settings.

Select the image and under the Object menu select Ungroup. Then slide one half of the image off to the side of the cutting mat.

Move the right hand side of the image into place within the registration marks as shown.

Then select “Send to Printer.” Choose your printer and desired print settings.

Place the printed page onto your cutting mat in the same position as on screen in the Silhouette Studio software. Then select your desired cut settings and send to the Silhouette to cut.
If you have chosen to print and cut on sticker paper, you can place the print right onto the walls of the 3D Paper Dollhouse Book making your own Dollhouse Coloring Book!
Enjoy and happy creating!