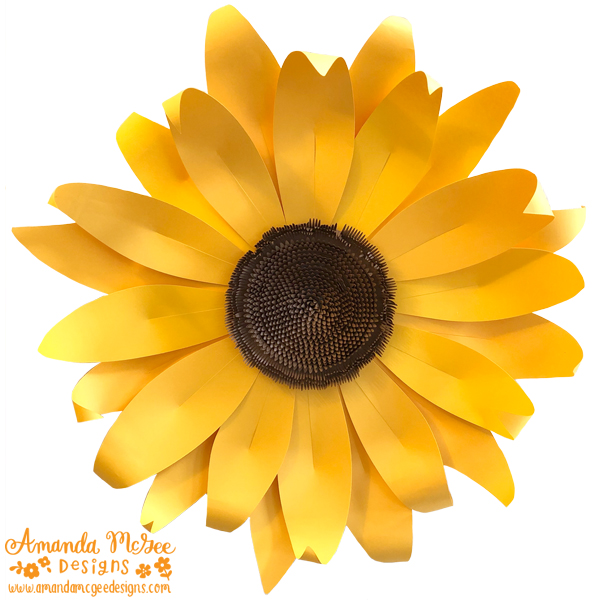
3D Giant Sunflower Instructions
Cut file available for sale in the Silhouette Online Design Store HERE.

Step 1
Begin by cutting 12-15 (or more) seed strips from brown cardstock, 4 of each petal from yellow gold cardstock, and one of each center piece from brown cardstock.

STEP 2
Glue along one edge of the center cut dart of each petal as shown. Fold the unglued side of the cut on top of the glued side of the petal as shown. This will create depth and dimension to the flower petal pieces.

STEP 3
Repeat that gluing process for all of the petal pieces. Set aside and allow the glue to dry.

STEP 4
Glue each of the petal pieces together end to end.

STEP 5
Wrap the center of the seed strip around a tweezers or other tool.

STEP 6
Add glue to the flower center piece where the small hole is in the middle. The hole is simply for making it easier to find the middle of the flower center. Adhere the seed strip to the glue.

STEP 7
Add more glue and wrap more of the seed strip around the center. Continue to glue and wrap the seed strip around the center flower piece.
TIP: Using a glue gun will allow the glue to dry quickly while still having a bit of work time to adjust the wrap.

STEP 8
Space and alternate the different shapes of the petals around the largest flower center piece. Glue the ends of each petal to adhere. Allow space in between each petal.

STEP 9
Add a second layer of petals between each of the petals on the first layer. Glue and adhere to the center flower piece.

STEP 10
Using a stylus or other tool, curl up the edges of each of the center flower pieces. Repeat for all three center sections.

STEP 11
Glue and adhere each center piece, starting with the largest and ending with the smallest on the top.
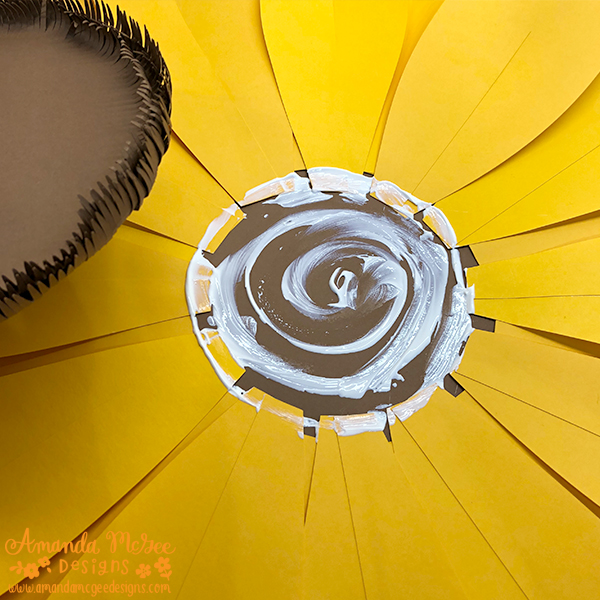
STEP 12
Glue to the center of the flower.
STEP 13
Glue and place the other center piece (with the wrapped seed strips) to the center of the flower. Press all center layers down to adhere and allow glue to dry.

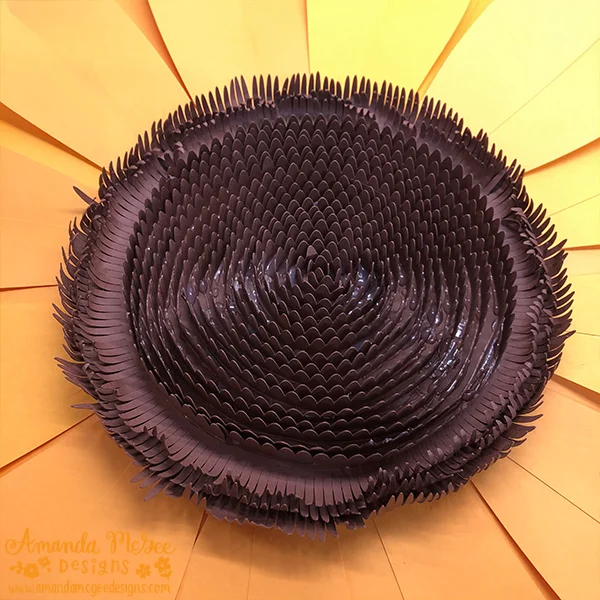
STEP 14
Press the seeds outwards to create depth and dimension. Curl and adjust as desired.
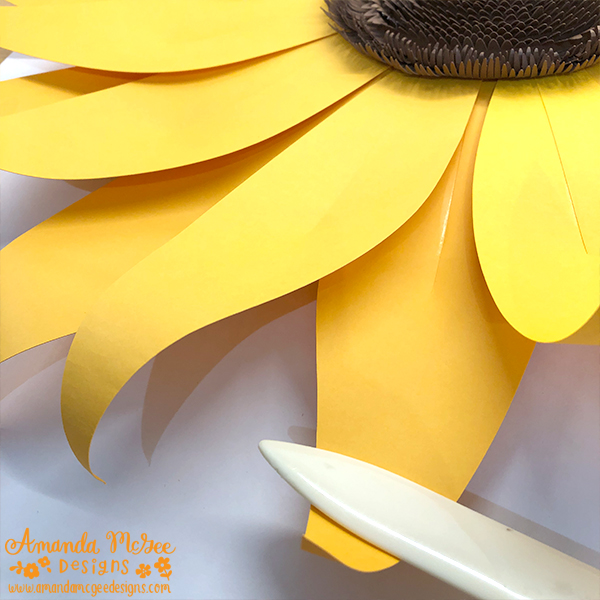
STEP 15
Curl, bend and adjust the petals as desired. Alternate directions of the curl to create dimension.
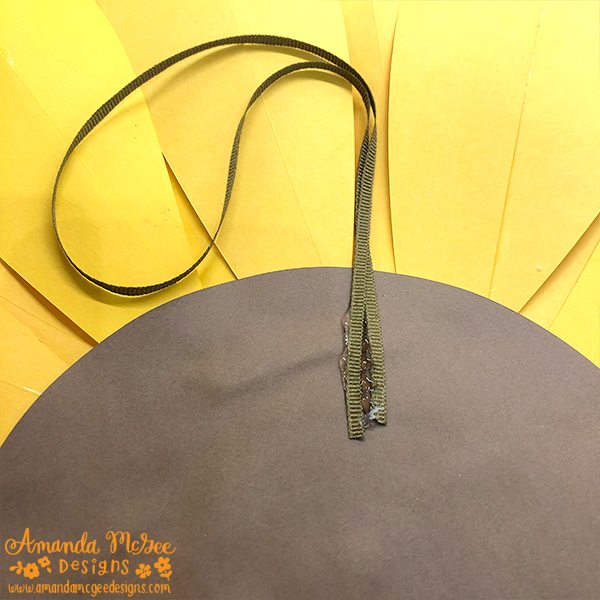
STEP 16
To hang the giant sunflower, glue a strip of ribbon to the back of the flower center.

STEP 17
Hang the giant sunflower from a wreath hanger as a fun and festive fall decoration!
Enjoy and happy crafting!
:) Amanda