3D Gumball Machine Ornament Instructions
Available for sale online in the Silhouette Design Store
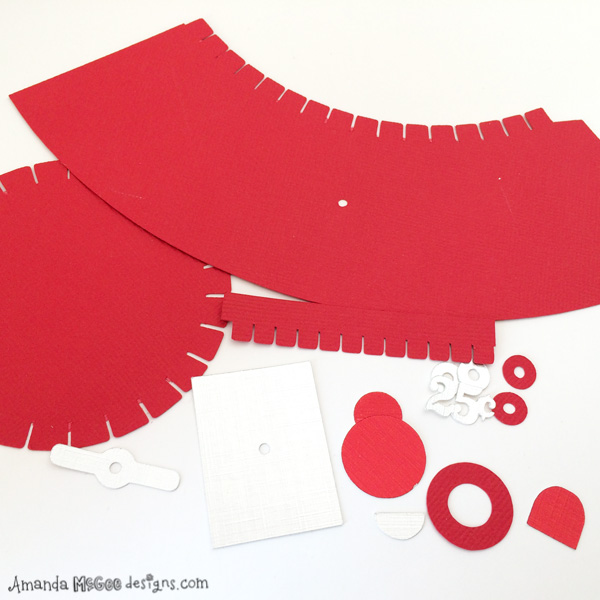
This cuttable template makes it easy to create your own decorative gumball machine Christmas ornament out of paper and a few additional supplies. You will need the following supplies to create this project:
Cardstock paper (I’ve used American Craft’s Primaries Heavyweight and Christmas Foil)
Glue
Permanent adhesive glue dots
Clear glass (or plastic) ornament
Multi-colored pom poms
Brad
Step 1
Cut all template pieces from desired cardstock. The original sizing of this die cut template design will fit a large 3 inch ornament. If you want to create a base for a smaller ornament (approximately 2 inch size) you will want to scale the entire design to 80%.

STEP 2
Glue side tab of the small band and wrap around and attach to the other side. Allow glue to dry.

STEP 3
Fold down top tabs. Glue circle to the top. Set aside and allow glue to dry.

STEP 4
Glue the 25 cent accent to the larger circle. Set aside and allow the glue to dry. (Make sure you use glue that will dry clear if you’re a bit messy like I am!)
STEP 5
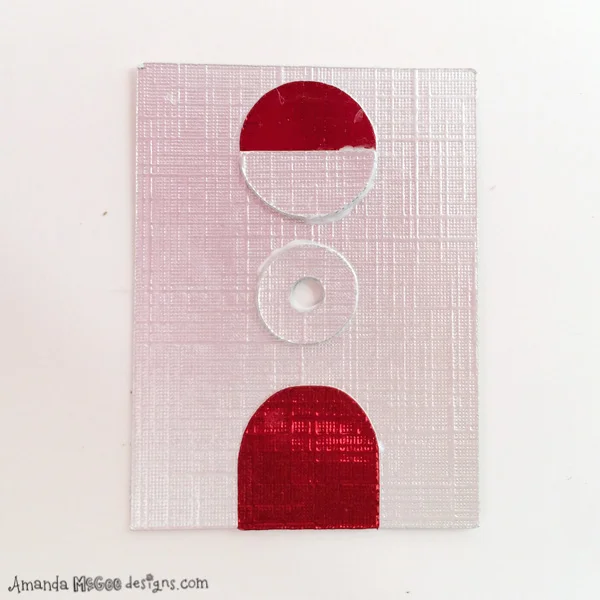
Glue and place the small circle on the center top of the face plate. Layer the semi-circle on top to create the “coin slot.” Glue and place the small arch piece on the bottom of the face plate. Glue and attach the washer to the face plate. If you cut and layer multiple washers it will create more depth to allow the crank to spin easier. You can also place washers on the inside of the base piece.

STEP 6
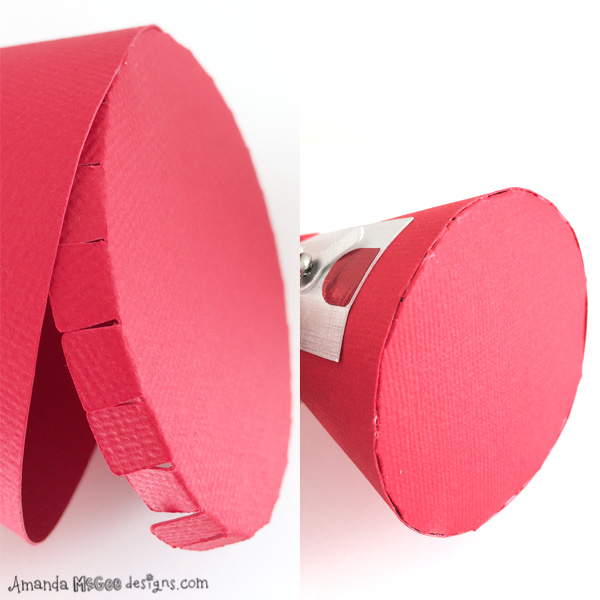
Curl base piece. Glue side tab and adhere to the other side of the base. Allow glue to dry.

STEP 7
Attach the face plate to the base, aligning the holes.

STEP 8
Attach the crank with a brad.

STEP 9
Open the brad tabs on the inside of the base.

STEP 10
Fold up tabs on the base bottom. Glue a few tabs at a time and adhere to bottom of base.
STEP 11
Allow glue to dry between each set of tabs, this takes some manipulating and patience! For the last few tabs, reach inside the base to adhere the tabs to the inside. Alternatively, you can use a strong adhesive dot roller.

STEP 12
Place permanent adhesive glue dots on the top tabs.

STEP 13
Fill the ornament with pom poms and replace cap. Firmly place ornament on top of tabs, pressing down so the tabs are hidden.

STEP 14
Attach topper to cap with glue.

STEP 15
Attach price accent to front of the ornament with glue dot adhesive. After the glue has dried, your ornament is ready to hang!

STEP 16
The larger size ornaments (usually found in a four pack) can be created at 100% scale. The smaller size ornaments (usually found in a pack of six) should be created at 80% of the original size. You will also want to use smaller pom poms for the smaller size.
Enjoy your holiday crafting!
Amanda