Box Card Instructions
Create your own a2 size Box Card with a gift card pocket. This digital die cut file is available in the Silhouette America Online Store.
This digital die cut template makes it easy to create your own cardstock box card, you can follow these instructions to create any of my a2 size box cards. You will need the following supplies to create this project:
Digital Die cutting machine (I’ve used my Silhouette Cameo, this file is also Portrait compatible)
Heavyweight cardstock paper (I’ve used Michael’s Recollections and American Crafts)
Adhesive (I’ve used Scotch Brand Quick Dry Adhesive and Thermoweb adhesive runner)
Gift card of your choice
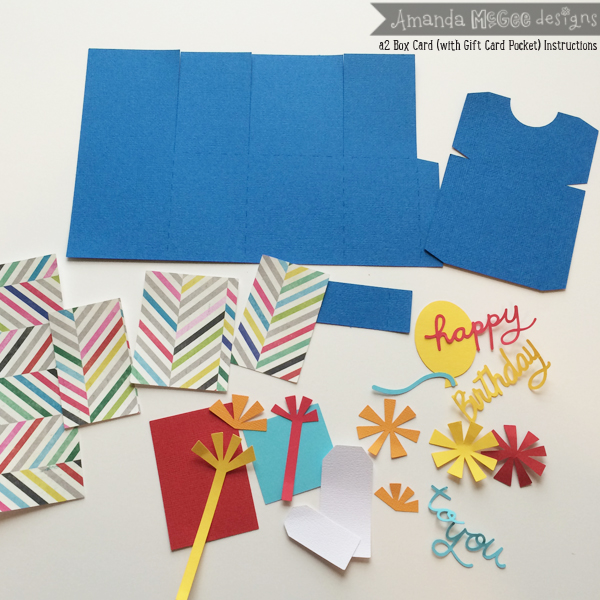
Step 1
Begin by cutting template pieces from desired cardstock.
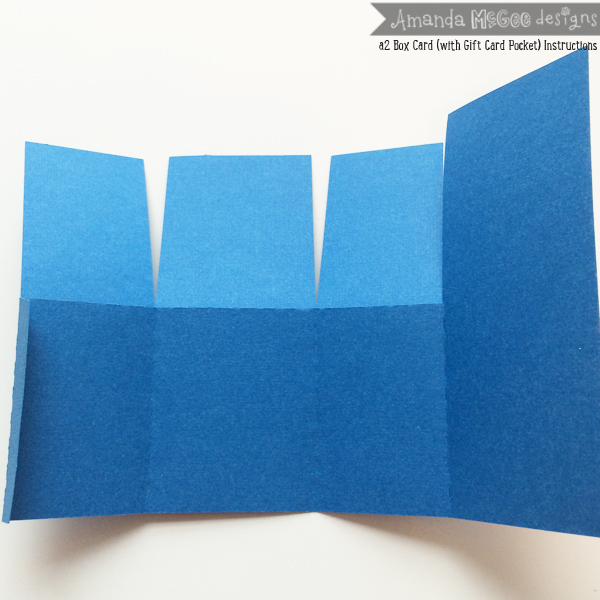
STEP 2
Fold the sides of the box card.

STEP 3
Adhere the tab to the inside of the card to create the box card shape.

STEP 4
To create the gift card pocket insert, begin by folding in the side tabs and add adhesive. Fold up the gift card pocket flap. Fold the side tabs in opposite direction. Add adhesive to the tabs, on the side where it will adhere to the inside of the box. Insert gift card pocket into the box card, the right side tab should adhere to the front of the right side of the box. The left side tab should adhere to the center of the left side of the box.

STEP 5
Fold the side tabs of the other insert in the same manner as the gift card pocket. Insert into the box in a similar manner, however, the left side tabs should line up with the back of the box and the right side tabs should be placed in the center of the box. Fold the box closed to be sure the tabs are adhered in the proper place, adjust as necessary. Open up the box and placed the decorative paper accents on the flaps of the box.

STEP 6
Assemble the accents as shown, placing the gift bows on the presents, the string on the balloon and the word art on the tag. Place the balloon on the back panel of the box, with it overhanging the right side. Be sure that the card is able to close. Adhere the bottom edge of the presents to the back of the inserts, placing the taller present at an angle to the left on the back insert and the shorter one at an angle to the right on the gift card pocket. Add the tag to the present. Adjust to fit, making sure the present accents don’t go beyond the box card edges or the card won’t fit in the envelope.

STEP 7
Place the word art on the side flaps, and the burst accents on the outside of the box where desired. Insert a gift card into the pocket.

STEP 8
Now your box card with the gift card is ready for giving, simply write a greeting wherever you wish. Perhaps on the back (taller) flap of the card, or on the balloon, and you could add a name to the tag.

STEP 9
Follow the box card assembly to create the celebrate box card (available for sale in the Silhouette America Online Store) as well. Layer the cake, party hat, streamers and celebrate word art as shown below.
A2 size envelopes to fit these cards, coming soon!
Enjoy and happy creating!
Amanda